Tuesday, October 26, 2010

Eyes of Newt


Believe it or not I try to do holiday activites with the kids.  When my daughter was younger we spent hours baking and decorating cookies for Christmas and other holidays.  With the monkey man I try to branch out a little more.  I've gotten brave in my old age and have learned that paint, and glitter eventually comes off floors, counters, and little hands.  I am great for trying holiday stuff and then waiting too long to put it up on the blog... like last year when I made hot cross buns for the first time the day before Easter.  I'm sure that recipe was going to come in handy AFTER Easter.  So to get in under the wire, I am posting a second entry this week... not like the soup was all that exciting anyway.

I saw this in an old issue of Martha Stewart Living and thought it would be perfect for double duty.  On one hand it was a fun little project for the Monkey, and they are doubling as little Halloween treats for his teachers at day care.

Pre-step: find a washable location in your house, and a t-shirt you don't mind getting painty... however the paint washed out of our shirt.

Step1: Take one happy kid

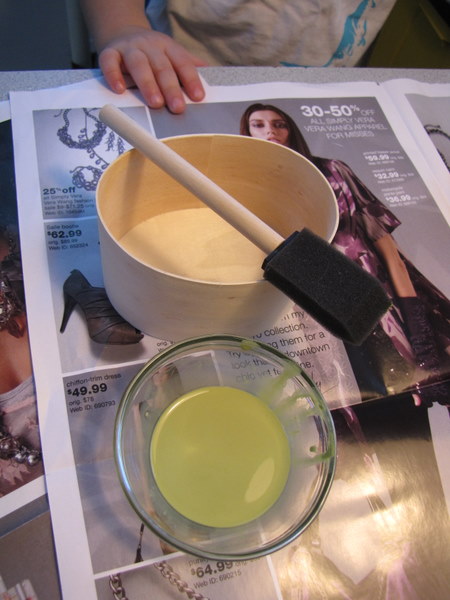
Step 2: Add a little acrylic paint and thin it with water


Step 3: Use those little foam brushes to paint wooden craft boxes inside and out.


Step 5: Load on the praise about what a great artist you have


Step 6:  Let dry.  We did ours a few steps at a time to break up the fun and keep the project in 10-15 minute blocks to match a 2-year olds attention span, and a parent of a 2-year olds temper when dealing with very messy projects.

Step 7: Print the clip art from Martha's webite here.


Step 8: Make up some black tea and "age" your labels.


Step 9: Let labels dry


I moved mine after about 10 minutes so it wouldn't dry to the paper plate.

Step 10: Squirt on a little white glue and use the sponge brush to make it into a thin layer to avoid glue bubble and parts that don't stick


Step 11: Fill with "Eyes"... the website says to use green, but these boxes are a little bigger and I thought a mixture might be more enjoyable.  It's the same effect as far as I'm concerned.


Step 12: Let the little ones give their special treats to their teachers.  Happy Halloween.

Monday, October 25, 2010

Broccoli Cheddar Soup... No Oven Week 4....


Just the company you keep can alter your personal habits.  This can be both positive (people that work out together), and negative (people that do drugs together), a little on the worrisome side (people that play dungeons and dragons together), or perfectly harmless like my co-workers.  I am outing all of us for the soup sucking addicts that we are.

There is a vegetarian soup shop run in Lincoln called the Grateful Bread.  Multiple days a week you can hear the rounds... I'm going for soup do you want anything... oh and the scones!!!  MY GOD MAN THE SCONES!  They are fantastic, but since I have no oven still lets not dwell on the scones for now.

It is finally a little cooler, and I have been stockpiling some soup recipes to attempt to limit the amount of time I stand in that ridiculously long line at the Grateful Bread once I am even bigger than I am now, and the temperature begins to drop as we near Winter.  I suspect standing outside in line while nine months pregnant in December will not be enjoyable... but that's just a guess.


I often find myself staring at the soups for the day thinking... why don't they ever have broccoli-cheddar soup... maybe it doesn't lend itself well to a vegetarian version but I wouldn't see why not... and then I remember... hey I've made that before, and if memory serves me corectly it was pretty good.  So I dug out the recipe and here it is.... I can't for the life of me remember why I made it with evaporated milk when most people make it with cream and this time I used red potatoes when I used russet before and I think it made it a little more gritty than I would like so I will return to the russet, but really any kind of milk type product and any potato substance should work just fine.


Next up in the stockpot.... Red Bean and Spinach!!  However, the stove is suppose to finally arrive on Wednesday so I suspect I will want to cook things in there just for the novelty of baking in a working oven.

Broccoli-Cheddar Soup

from 25-year old Eileen's Kitchen

Ingredients

Cooking spray
1cup chopped onion
4 cups chopped fresh broccoli (about ¾ pound divided)
2 cups diced peeled red potato (about ¾ pound)
½ teaspoon garlic powder
2 minced garlic cloves
2 (10 ½-ounce) cans of low-salt chicken broth
1 bay leaf
1 cup (4 ounces) shredded sharp cheddar cheese
1 (12-ounce) can evaporated milk
Dash of pepper

Method

Coat a large dutch oven with cooking spray; place over medium heat until hot. Add onion and garlic; sauté 5 minutes. Add 3 cups of broccoli, potato, garlic powder, broth, and bay leaf; bring to a boil. Cover, reduce heat and simmer 20 minutes or until vegetables are tender.

Discard bay leaf. Place half of broccoli mixture into blender; cover and process until smooth. Spoon into a bowl. Repeat with remaining broccoli mixture. Return broccoli puree to pan; add cheese, milk, pepper, and remaining cup of broccoli. Cook over medium heat 4 minutes, or until broccoli is just tender, stirring until cheese melts.

Serves 8

Monday, October 18, 2010

No Oven Round II, Week III..... Pickled Eggs and Beets


Let us pretend for this week that this is a new photo, and that I didn't ravage my library looking for something that you could make without an oven, because quite frankly last week was hell on earth with school, and sick family members, and all sorts of not fun things. And let us pretend that my meals didn't really come in foam boxes, and take out bags, and weren't poor excuses for food, minus the Greek take out that was fantastic.

And let us pretend that this monstrosity never graced my bowl or even the grocery cart for that matter....


No that is exactly what it looks like... your garden variety beef flavored Ramen. I haven't eaten it in about ten years and let me tell you I love every single bite! There was also a box of Kraft Mac and Cheese ::hangs head in shame:: Now we shall never speak of it again.

Okay, so I had the week from hell, I was assigned 4 papers to write in 5 days totally 60 pages, my kids were sick, and my husband was out of town, and I'm almost 7 months pregnant, and I just wanted to feed the faces in front of me with as little arguing as possible (my temper was not fantastic, I didn't want to push it), and I just wanted to get through the week. I was in Survival mode, and often when that happens you really don't have time to think up fun and exciting meals that can be made with a skillet, a crockpot, and a rice steamer. There were no MacGuivereque moves in the kitchen this week. No, this week we had take out and order in, and frozen things you microwave and I'm not apologizing because it was necessary and it happens like once or twice a year, and come on people... if you can do better, you are more than welcome to come on over and cook. We will eat whatever you put in front of us without a single complaint. However that time has passed for the moment and we are back to normal food.


I discovered these eggs when I once had a craving for Spicy Pickled Eggs.  I never did find a good recipe and had to make one up... which was great but needs the smallest tweaks still....you find them everywhere in the Northeast, yet I have yet to see them anywhere in the Mid-west.  I made these first before that spicy batch and had a hunch they weren't what I was looking for... the beets and sugar being a dead giveaway, but in the end I decided to make them again later on (if you're really observant you notice two different types of jars one from each making. 

We used them for a non-dinner dinner... which is when we are in a situation like we were this week and just the idea of eating something that isn't take out, requires minimum work and clean up can brighten your day. 

We sliced the eggs, beets, and onions up and served them with cheese and bread... and probably wine... the last time we ate them I don't think I was pregnant (it's an older recipe).  I'm kind of cheating because I made them awhile ago, but I plan on making them this week... so it's only a semi-cheat.  And it's kind of a rounded meal in my mind... eggs=protein, beets and onions = vegetable, cheese = dairy, and bread = grains.

On second thought, this is almost a double cheat because I did have an oven when I made them and I did roast them in that oven, but you could (and I have) roast them on a grill on medium heat turning occasionally so I'm not going to sweat the details.

Roast your beets....
  

Peel the skin and quarter....

Throw them in a jar...


Add sliced onions.... add the rest of the stuff.... let pickled in the fridge.... slice and serve on baguettew with the beets and  onions as well.  This can be served as a meal like we did, as a snack, or as a side for any occassion (maybe not formal, but the rest are okay).

Pickled Eggs and Beets
adapted from Emeril Lagasse

Ingredients

1 pound red beets, stems and leaves removed
1 cup apple cider vinegar
1/2 cup granulated sugar
1/2 teaspoon whole black peppercorns
1/8 teaspoon pickling spice
6 large hard-boiled eggs, peeled
1 small yellow onion, peeled and sliced
2 cloves garlic, peeled and smashed
Fresh dill sprigs, garnish
Sliced French bread, as an accompaniment

Method

Preheat the oven to 350 degrees F, or grill to medium if you have no oven.

Wrap the beets tightly in aluminum foil and roast until tender, 1 to 1 1/2 hours. Remove from the oven, uncover, and let sit until cool enough to handle. When cool, slip the skins from the beets and cut into eighths.

In a non-reactive saucepan, combine the vinegar, sugar, peppercorns, and pickling spice. Bring to a boil and cook, stirring occasionally, until the sugar dissolves. Remove from the heat and let sit for 2 hours for the flavors to develop. Add the eggs, onions, garlic, and beets and turn to coat evenly. Cover tightly and refrigerate, turning occasionally, until the eggs are a deep pink color, at least 8 hours and up to 24 hours.

To serve, remove the eggs, beets, and onions from the marinade and arrange on a platter. Garnish with sprigs of dill and serve with sliced French bread.

Tuesday, October 12, 2010

Chicken Etouffee...no oven week 2 (week 10 or 12 for the life of the oven)


Or more things you can cook WITHOUT an oven! Things had briefly cooled off here and I wanted to bake up a storm, but that time has passed and it is back in the 90s!!!! Really mother nature? Lithium... look into it. The baking desire went unfulfilled at any rate because my oven still isn't working. We got rid of the demon stove and ordered a new one and it came in and it was all shiny and new and beautiful and I had high hopes that it would bake evenly without shutting itself off and all those other fancy things that stoves do!

The dutiful husband made space for the new oven, and then it was slid into place and after all the debris has been cleared and everyone else had long gone to bed, I walked into my kitchen to admire my new stove that I would soon be using with abandon. I walked up the stairs with images of smiles and warm feelings all around peeked into the kitchen and thought.... THAT IS THE DUMBEST LOOKING ARRANGEMENT I HAVE EVER SEEN! I promptly began my spiraling decent that often begins with something benign like "that stove doesn't look right" and ends with... "Well we're going to have to just sell the house, it's the only way". However after a few moments and a small number of measurements I realized we can fit a full (if not full-sized) stove with cook top all in one deal like normal people have into that space, because this simply will not do!


No your eyes are not deceiving you that is about 2 inches off the floor and my husband and I disagree as to whether or not the door sits on the floor when opened... combine that with the fact that the space to cook is about 18 X 12 inches and it MUST GO.  The worse part is... it looks better in the photo.

And then there is this little problem of hideous nature that would have to be replaced should we keep this oven.... which we're not.
It is stained, it is ancient, it is broken, it is ugly!  That's actually sawdust on it in the photo from where the darling husband had to make the whole bigger to fit the miracle midget II.

Google, google, google, discuss with husband... get the okay.... google, google, google, argue for the more expensive model, bring in brother-in-law for back up and wham-o! The new oven will be on its way as soon as we get someone to help us return the one we have now. Until then I am in need of some stove top recipes and am lucky enough that one of our favorite dishes is all done on the stove top. I found this recipe back when my husband and I were dating. I was recreating our first date to a fantastic Cajun restaurant in Montreal, and I happened to pair it with what ended up being our favorite wine. Although we can't get it here in the Midwest without ordering it and after a quick stop at their website I realize they have acquired more vineyards, and changed their labels and cork style... I'm very sad. It used to be a tiny vineyard, with a wax covered cork, and the grapes were still stomped by foot (not a big appeal actually), I will have to investigate further when I can actually drink wine again... however I did notice the prices were cheaper by quite a bit so that might be a fair trade.  And no feet.

Now I cannot tell you how rich and delicious this is. As you're making it even the aroma hints at the depths of it flavor. It starts all simple with a roux like so many Cajun dishes (actually I'm lying it starts with searing your chicken, but half raw seared chicken isn't the most appealing thing to look at, and the recipe is below after all).

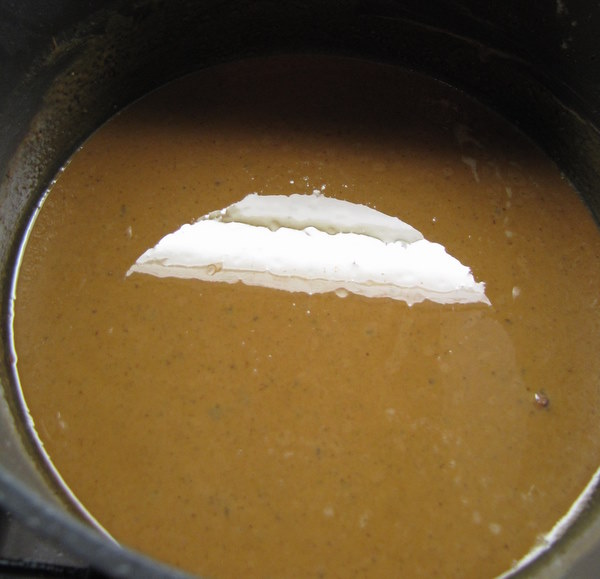
Cook that down until it loosens up and become a chocolate brown, the deeper the better as long as you're not burning it. This step can take a minute but don't rush it, it makes a huge difference.

Add your veggies and stir. It will make a veggie sludge of sorts, that doesn't look very good but smells amazing. In fact every time I get to this step I think.... this might be good to eat as is but I manage to contain myself because as great as it smells, the combo of uncooked veggies and cooked roux probably isn't as good as the finished product.

Add the Guinness and scrap down any little brown bits (or flavor crystals as the husband calls them).... add your chicken back and simmer, simmer, simmer....... take the chicken off the bone, return to the pot and cook until desire texture and by that I mean.... if you want the chicken to completely fall apart a la chicken fricassee it will, otherwise you can stop the extra cooking step while the chicken is still in chunks. I personally like a little of both so I hold back half the chicken and add it back in 15 minutes later than the first half.

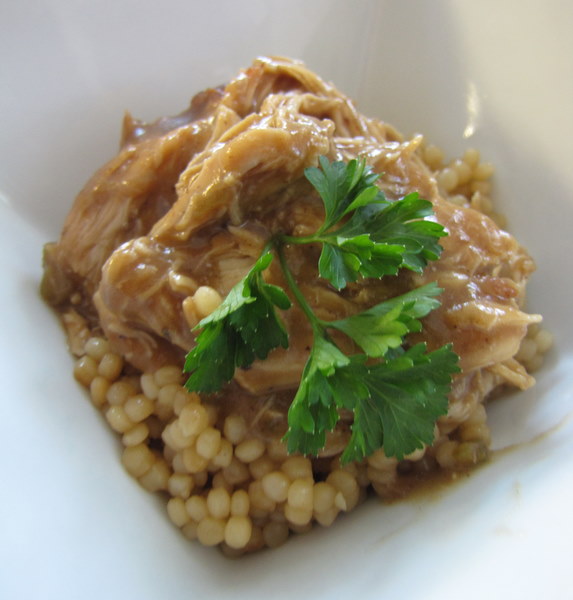
This is soooooo good you will forget that you don't have an oven, and as you munch down you think.... pass me the cornbread... ohhh.... and then you're sad again, but only until the next bite. If it is Fall weather at your house you must make this. Tonight. I served it over Israeli cous cous cooked in chicken broth instead of water but you can serve it over your favorite starch. We've done potatoes, and rice as well... it's all good.


Monday, October 4, 2010

Artichoke Carmelized Onion and Roasted Red Pepper Flatbread... don't forget the capers.


When you're oven is dead and you have a group of women coming over for a book club, having no food is not an option.  Well it's not an option for me, especially since I cannot partake of the wine and other alcoholic goodies.  Lucky for me I still have a grill and a husband that has a couple of recipes up his sleeve.  One of my favorites is his grilled flatbread.  I should probably call it our flatbread as I am the creative force behind the toppings.  I wanted to do vegetarian toppings and this is the first time I have thrown this combination together and it was sooooooooooo delicious, it may be my new favorite.  I adore artichokes especially on pizza, but I hadn't really planned ahead past picking up the artichokes at the store... brilliant I know.  I blame pregnancy brain.  Anyway... looking in the refrigerator I thought... hmmmmmm how about carmelized onions, aaaaaaaaaaaannnnnnnnnnnnnnndddddddddddd.... hmmmm there's a red pepper in the crisper, maybe roasted red peppers, another of my favorite.  Now I would normally add goat cheese to this but since it is going to be grilled the topping don't get super hot so I couldn't have goat cheese so regular mozzarella would have to do, but I still wanted something a little salty so I used capers.  Then I put them all out on the counter and thought... is that going to work together.  Imagine this is where the little light bulb appears over my head.  A quick check into The Flavor Bible gave me a confirmation that all of these flavors do go together, very well.  YES!

The next step was to decide the sauce.  I'm a big fan of olive oil and fresh herbs instead of red sauce, especially thanks to the joys of heartburn during pregnancy, but while looking at the toppings I thought that a white sauce might be great, and I personally think it was... hence the new move to favorite flatbread status.

Now we're ready..... when my husband makes the flatbread, I first decide what goes on each one then I prep the toppings and sauce and put them all together so he can just throw them together out on the grill.

First the boys prepped the dough, the recipe link to an earlier post is below... it makes 6 flatbreads, and they freeze beautifully pre-cooking so make the whole batch you won't be sorry.

 I drained the artichokes (I don't do fresh artichokes they are not worth it if you're going to add them to other things), cut them in half and have them a quick sear on the grill pan.

Carmelized a little onion

Roast the pepper

 I like to set it over the gas burner (don't judge my ancient stained burner... it will be replaced asap now that we've got the oven ordered), until charred.  For those stubborn spots that don't like to char I have a crème brulee torch, that thing comes in handy often.

Once it's all burnt and smelling delicious, throw it in a paper bag and close the top.  You want the whole thing burnt, the red parts in this photo are actually where the skin has blistered and peeled back.  Leave it in the bag for about 10 minutes, open the bag stem and seed the pepper and you can either wash or scrap the skin off at this point, it should come right off.


 Rinse and dry some capers and add everything to a convenient carrying case for your  husband. 


I won't add the photo of the sauce because it smells and tastes better than it looked under poor lighting but I'll make sure to give you the recipe.

Grill it up and serve.... don't expect a whole lot of leftover... I remembered this photo a few minutes after the flatbread hit the table.


Artichoke, Carmalized Onion, Roasted Red Pepper and Caper Flatbread... whew that's a long one
adapted from Eileen's little pea brain

Ingredients

Toppings
2 serving dough (makes 2 flatbreads, split the toppings below between the two)
olive oil
fresh oregano (to taste)
1 red bell pepper, roasted an sliced thin
1 can of artichoke hearts, drained, rinsed, dried, cut in half and seared if so desired
handful of grated mozarella or cheese of choice (there is parmesan in the sauce so nothing overwhelming)
2 teaspoons of capers, rinsed and dried
white sauce (recipe below)
1/2 large white onion, carmelized

White Sauce
2 tablespoons butter
3 tablespoons flour
1 cup milk
1/4 teaspoon salt
1/8 teaspoon pepper
1 garlic clove, minced
2 tablespoons fresh basil, minced
1/2 cup parmigiano-reggiano cheese, shredded

Heat butter in a small saucepan. Add flour and stir until thoroughly mixed.

Slowly whisk in milk, adding gradually. Stir in remaining ingredients. Will thicken upon standing.

Method

Prepare toppings as stated above.  Prepare white sauce, keep warm if possible or give a good stir right before adding. Prepare dough from HERE, and that link will also tell you how to grill it up.  Sorry I'm totally lazy and don't want to rewrite it.  Have a good week.

Monday, September 27, 2010

Steak Chimichurri


This post originally started.... the weather has FINALLY cooled around here, but the little icon in the corner of my screen says it will be 90 AGAIN today! (Well it did it will be 60 today... Fall arrived sometime between when I wrote this post and today).  Will someone please hand mother nature her medication and can we move on?  Maybe it's the heat, or the hormones, or the sore back, but as I scrolled through my favorite food blogs today I found myself wanting to delete all the links with perfectly staged photos of gorgeous food, with intricate topped minature tarts, and perfectly lit baked goods against sickenly cute antique spoons and linens.  Normally I adore those shot and aspired to some day have the time, energy, and talent to do such things.  However, today, and at this stage in my life it is not happening... and I'm fairly certain it's not happening tomorrow, or next week, or anytime in the next few years to be honest. It is time to accept that the choices I have made to expand our family with little munchkins, to allow little furry children to roam around with the human children, to go back to school yet again while working, and to do all of this thousands of miles from all family means.... I will not be a sophisticated blogger anytime soon.  And I've come to the realization that I don't really care, it's who I am at the moment.  I blog for my friends to show them that they can cook simple easy stuff for their families without stressing, and that is not going to come through with perfect lines of macaroons, and other such things.  The times when I get the most feedback/texts/and emails saying... I am making your (insert food here) today.  Are the times when I make stuff that can be thrown together and is not scary or daunting in the slightest.  The times when people look at the recipe and think... I can do that.

So today I am in love with the new bloggers out there, that don't have fancy cameras, or tricks up their sleeves.  The ones that squeeze in a dish between walking their dog, having tea parties with their children, or working the two jobs required to pay off their over-inflated school loans.  My favorites today are the off-centered photos with the off-set colors because not only do they not know how to use photoshop, they don't own it!  Bloggers that don't have 3 days to make 100 bite-sized tartletts for a friend's baby shower, or their own cookbooks... people who just want to eat something that tastes good and doesn't come wrapped in a wax coated piece of paper.  People that want to feed their families, clean up after dinner, and still have time to read Where the Wild Things Are for the 50th night in a row because they love to hear their 2 year old jump out of bed, and tell the wild Wild Things... BE STILL... complete with minature stomp and stop in the name of love pose.  People like me really.  And so if you are in an exhausted funk, and it's the end of the season where you live and you want to clear out your herb garden, make a good dinner, and have time for family and friends..... I give you.... the fastest meal this side of the SUMMER CONSTRUCTION HELL.  Ta Daaaaaaa.

Throw it all in a food processor or blender...... and it doesn't even require the cooperation of one evil oven, if you should have an oven that a) never works properly under the best conditions and b) has given up the ghost once and for all as you refuse to spend another dollar fixing something you despise!


Flank Steak with Chimichurri

Adapted from Gourmet

Ingredients

1 1/2 pounds trimmed flank steak
1 1/2 teaspoons kosher salt
1/2 teaspoon ground cumin
1/2 teaspoon ground coriander
1/4 teaspoon black pepper
1 large garlic clove
1 1/2 cups fresh cilantro
1 1/2 cups fresh flat-leaf parsley
1/4 cup distilled white vinegar
1/3 cup olive oil
1/4 teaspoon cayenne

Method

Preheat broiler. (or grill if you're oven has died like mine)

Pat steak dry. Stir together 1 teaspoon salt, cumin, coriander, and pepper in a small bowl and rub mixture onto both sides of steak. Broil steak on a broiler pan about 4 inches from heat 6 minutes per side for medium-rare. Transfer to a cutting board and let stand 5 minutes.

Meanwhile, with motor running, add garlic to a food processor and finely chop. Add cilantro, parsley, vinegar, oil, cayenne, and remaining 1/2 teaspoon salt, then pulse until herbs are finely chopped.

Holding a knife at a 45-degree angle, thinly slice steak. Serve with sauce.

Monday, September 20, 2010

Fried Brussel Sprouts with Walnuts and Capers


Oh they aren't pretty but they are delicious!  I don't think qualifies as a health food of any sort with all the oil kicking around and the deep frying and all, but it is a way to eat a serious serving of brussel sprouts and want more.  I saw this dish on Foodnetwork's The Best Thing I Ever Ate and was excited to see it was actually posted.  Everyone seemed to love it so I figured why not, there are only so many steamed boring veggies you can eat without getting really bored.  These were amazing!  I made them ahead of time and left them in the bowl on top of the vinaigrette and tossed it before we were ready to eat.  I think next time I would keep them separate so I could whisk the dressing one last time before serving, it separated out a little but was still fantastic.  I will cut back on the oil in the vinaigrette next time, probably quite a bit.

And seriously, when's the last time you saw leftover bread and meat but a bowl of vegetables look like this?


Fried Brussel Sprouts with Walnuts and Capers
adapted from Michael Simon (Lolita)

Ingredients

*Canola oil, for deep-frying
1 clove garlic, minced
4 salt-packed anchovy fillets, rinsed, filleted and minced
1 serrano chile, seeded and minced
1/4 cup red wine vinegar
1 tablespoon honey
2 scallions, white and green parts, thinly sliced on the bias
1/2 cup walnut pieces, toasted and coarsely chopped
1/2 cup extra-virgin olive oil
1 pound Brussels sprouts, trimmed and quartered lengthwise
2 cups loosely packed flat-leaf parsley leaves
2 tablespoons salt-packed capers, rinsed and patted dry
Kosher salt and freshly ground black pepper

Directions

Pour enough oil into a medium pot so that the oil comes 3 inches up the sides. Heat the oil to 350 degrees.

While the oil is heating, whisk together the garlic, anchovies, serrano, red wine vinegar, honey, scallions, walnuts and extra-virgin olive oil in a bowl large enough to toss all of the Brussels sprouts. Keep the bowl near the stovetop.

Working in batches, deep-fry the Brussels sprouts until the edges begin to curl and brown, about 3 minutes. To the last batch, add the parsley and capers (stand back-the capers will pop and sputter!). Give the contents of the pot a stir. When the color of the parsley becomes a deeper, more saturated shade of green, about 30 seconds to 1 minute, remove the contents of the pot with a skimmer and place directly in the bowl of dressing. Toss to coat. Add salt and pepper to taste.

*I saw on one of the reviews (after I made it) that Michael Simon actually uses peanut oil, but I used the canola and it was great